Feeds:
Posts
Comments

Here at RockStahl Ranch we have chickens that provide us with lots of eggs. That means lots of opportunities to try new things with eggs. Here is a new recipe (patent pending … I wish) for making great tasting eggs that is a combination of fried and scrambled eggs. But the main reason for making the recipe at home is to mess with peoples head and have fun.

First the recipe (scale it to whatever size you want):

2 eggs
1 Tablespoon of milk
1 Glob of seasoning, whatever you can dream of to make it tasty and exciting.

Separate the yolks from whites. I do this with the shell.
Whip the eggs with some milk and your seasoning.
Heat a pan the you would to fry and egg with butter, oil or my favorite bacon fat.
Pour in white mixture and then gently place the egg yokes on top of that.
Try to come up with several clever sayings when you server these to family members or guests.

Here are some starter ideas for when you serve the eggs.
“I left the eggs on the counter for a few days, but I think they are ok.”
“These are bald eagle eggs I bought on ebay.”
Image

Paprika style eggs. Lots of paprika (mine is freshly ground and a bit orange. I am sure you can get a better red color with store bought Paprika.)

Image
Pesto Eggs. Great to serve with ham for Dr. Seuss reading marathons.

Now it is your turn. I would love to know and see your creative inspirations, or videos of people’s first reaction to eggs that just don’t seem right. Post or send me pics and I will include them in this blog!

Yes I have neglected this blog for a few years now and it is time to start writing again.

Yep, another reason to hate us Californians. While the rest of the country is blanketed in snow, we’re out in the woods hunting for shrooms – golden chanterelles, hedgehog mushrooms, blewits, candy caps, and my all-time favorite, the black trumpet.

I joined the Mycological Society of San Francisco’s annual foray/camp in the Mendocino Woodlands last November.  I must’ve gained 5 lbs in two days.  If mushroomers didn’t get off their rears foraging fungi, we’d all have to be on crash diets during the dry season! I also spent a few hours trying to identify unknown mushrooms with J.R. Blair, a Biology lecturer at SFSU who introduced me to keying techniques a couple of years ago. But I have to confess that my belly has the upper hand which pretty much narrows the variety of mushrooms my brain pays the most attention to out in the field.

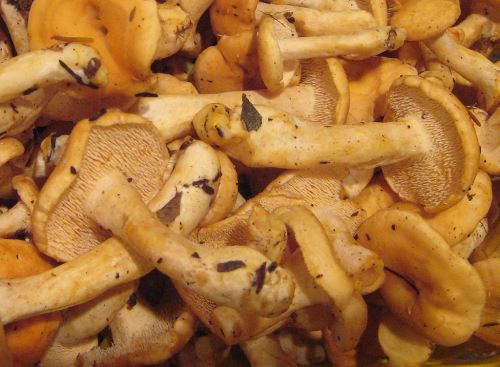
Hydnum umbilicatum or hedgehog "bellybutton" mushrooms

Hydnum umbilicatum or hedgehog "bellybutton" mushrooms

Pizza with hedgehog mushrooms

Pizza heavily laden with bellybutton mushrooms, pepperoni and bell peppers!

This January, the Bay Area Mycological Society’s All California Club Foray was in full swing at the Albion Field Station, also near Mendocino. Yes, we pigged out there, too, thanks to the superb catering from Debra Dawson, owner of Good Thyme Herb Company & Catering.  But the ‘mycogeeks’ were also busy ID’ing those LBMs (little brown mushrooms) as well as gorgeous waxy caps and slimies like the parrot mushroom below.

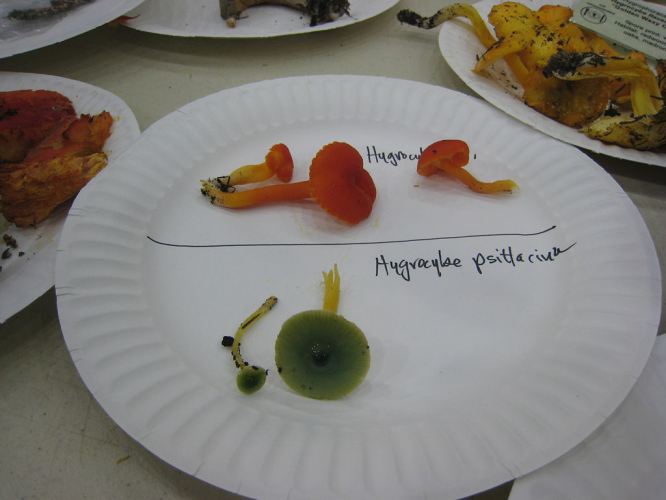
Beautiful fresh "parrot mushroom"

This is no LBM, but a gorgeous green, slimy parrot mushroom

The Sonoma Mycological Society also held their camp in January, but at the CYO Camp near Occidental. The venue is ideal for courses in mushroom dyeing, making your own oyster mushroom kit, drawing, identification, and listening in on various topics given by experts from the fungal world. Gary Lincoff (shown below), author of several mushroom books, including The Audubon Field Guide to North American Mushrooms, is a popular guest from the East Coast, and whom you can always count on to add a few humorous anecdotes in his mushroom lectures.

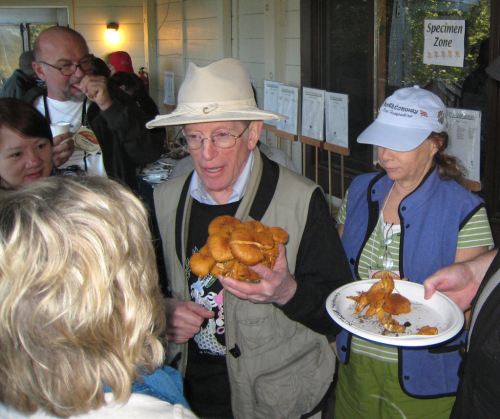
Gary Lincoff and Gymnopilus ventricosus

Gary Lincoff talks about "Big Laughing Gym" - but the West Coast variety will make you hurl, not laugh 🙂

But the best part of mushrooming isn’t about the mushrooms as much as it is about the people who love mushrooms and share their love for good food prepared with wild mushrooms. Yes, the thrill of discovering your first morel in a quiet spring forest is exhilarating. But coyly giving the general whereabouts of  that mother lode of black trumpets while sharing some of the loot over a bottle of wine is so much more fun.

Sharing appetizers at San Jose Camp near Yosemite

Sharing appetizers and morels at San Jose Camp near Yosemite

We are coming up to our 9th month of raising eleven chickens from chicks (one had to be fast-tracked to chicken heaven because of disease and a broken leg), and enjoying the nutritional and entertainment benefits of having them! For those of you wondering about the cost/benefit of raising chickens (assuming no zoning restrictions in your ‘hood) here’s the Chickenomics:

Chickenomics is about the cost/benefit of keeping chickens

Click on image for larger size. As you'll see, the chickens earn their living!

  • We use an Excel spreadsheet to track daily egg harvest, feed consumption, and any other types of “income” (egg sales to neighbors, if we have surplus) to gauge how much it costs to keep chooks vs. how much we save not having to buy free-range, organic eggs from the supermarket
  • It costs about $35/month to keep 11 hens (not to mention the farm mice) well-fed and happy. Evidently, the days of something costing “chicken feed” are gone! The girls go through about two 50-lb bags of layer feed/month.
  • Our happy (spoiled, even) free-range hens supply about $70-80/month of eggs (price of free range, organic eggs at our local grocer is $4.50-5.00/dozen!). Each hen lays about 5-6 eggs per week in the summer; and about 40% less in the winter.
  • No fear of ‘tainted eggs’ – we’re confident our chooks are healthy and clean. That’s quite a savings!
  • Being around chickens is a boost to your mental health. If you’re ever sad or upset, go to the chicken run, throw them an apple core, and watch the mayhem. *Priceless*
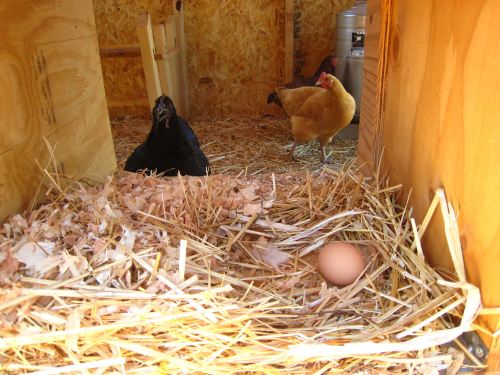
    Indignant Shirley and our third egg. Don't know if she laid it, but she sure looks PO'd. Actually it's just hot (high 90's and she's panting)

    Indignant Shirley and our third egg this past summer.

    Now for the “fixed costs” that were not mentioned above:

  • Fencing, building and materials for the chicken coop was >not< cheap. But we wanted to put something up that was not an eyesore (the coop is in the foreground of our backyard view of the distant mountains – why create a Coopenstein?
  • How much exactly? I can’t remember, I was swooning. Ok, ok, somewhere betw. $1-2K for the 16 sqft brooder coop and the 6x8ft (48 sqft) chicken coop with 3 nesting boxes. Yes we could’ve made it cheaper but didn’t, so don’t take our numbers as the benchmark. However, some finished coops are ridiculously expensive, well into the $2K range for the size we built. We do believe that ours is functionally well-designed, but that’s a separate topic we’ll address in another blog.
  • It took about 4 1/2 months until our chickens started producing eggs, so figure spending about $150 on feed prior to their laying. This cost is quickly recouped, as you’ll see in the spreadsheet above.

The final word – we do not put a lamp in the coop to extend the hens’ laying season, tricking them into laying the same number of eggs as they do during the longer days of summer. First of all, we don’t consume 9-10 eggs/day nor need to sell them for income. We’re always pleased to be able to get a few dollars for them, and our friends are thrilled knowing their inexpensive, fresh eggs come from super-happy hens!

The Lemon-Mobile

No, not a blog about cars with defects.  This is about working with our climate to keep our lemon tree alive in the winter!

As is often the case, I want to push the limit as to what I can grow in my microclimate here in Lake County, CA. In this case it is lemons. The summers here are plenty hot, but the winter has too many days when it can dip below freezing. While a mature lemon tree supposedly can handle the winters here, the young ones cannot.

Lemon trees that are between 1-2ft tall are reasonably-priced. I got an Improved Meyer Lemon tree at the end of summer for $25 plus a 30% discount because the nursery was clearing out inventory.  A lemon tree that is big and hardy enough to handle the winters in its first year has to be delivered by truck, and can be $100-200 depending on how large you want it.

Meyer Lemon tree on dolly

Meyer Lemon tree on the go

My answer was to get a small lemon tree and make it mobile. Pictured here is the lemon tree with a dolly that I got when we moved from the coast this year. In the winter I will move it in and out of the garage when the temps fall to the mid to low 30s (F) and below.

Incidentally, make sure you select a dolly that can handle the weight of your potted tree/plant. Some are relatively inexpensive ($10 or less), but these have small wheels and cannot handle a lot of weight. Our lemon tree is quite heavy, so the hand truck/dolly that we used for moving was perfect because it has large wheels and the right weight capacity.

How well will this system work? Well either I will be writing a success story follow-up to this article or crying in the next few months. When writing Plangarden blogs, I want to document successes as well as failures. I leave the perfect garden stories to the TV shows where nothing really ‘goes wrong’.

There is a morning every fall when the vegetable gardener grabs his/her coffee/tea and heads out into the garden. The harvest is starting to slow up and there is an extra bite of chill in the air. Soon, a white blanket of frost will cover your beds. For some gardeners, it marks the end of the year. For stubborn gardeners like myself, we want fresh, pesticide-free veggies from the backyard, and as few produce as possible from Mexico or New Zealand or Russia where fuels are consumed to haul them thousands of miles to the local grocer. We’re not localvore zealots, but if possible, we want to keep veggies growing until a really hard freeze.

This year, I had to face frost for the first time in over a dozen years. I wanted to build a frost blanket system that I could not only use for short veggies, like lettuce, but also for taller plants like broccoli and cabbages. Next year I will use the same system for a shade cloth to protect veggies from our scorching sun.

Here’s what I came up with:

Frost blanket framing using PVC pipes

Frost blanket framing using PVC pipes

A Quick Math Primer

We will use the forumula > 2∏r < (the circumference of a circle, where ∏=3.14) to determine how much PVC pipe to make a semi-circle over a row. This is just to get started because your semi-circle may be more semi-elliptical to account for taller plants. Let’s simplify ∏ as the number 3.

Therefore, a half circle is 3 times 1/2 the width (i.e. diameter) of your bed, or even simpler, 1.5 x width of the bed. For the above bed where the width is 4ft, the minimum pipe length should be 6 ft (1.5 x 4).


Half inch PVC pipe fits well over rebar

Half inch PVC pipe fits well over rebar

Half inch coupler joins PVC pipes

Use a half inch coupler to join PVC pipes.

Low, Med, High, Super High

By using inexpensive half inch couplers, you can adjust the height of this frost blanket system to match the height of the vegetables you are protecting. Remember that you want the blanket to get as close and low to the vegetables as possible without touching them. It’s the warm air pocket that insulates the plants, not the blanket.

My Frost Blanket System

  1. Purchased 10ft x 1/2″ PVC pipe. Easy to bend and cut. Made two lengths of 18in sections off each pipe to use as extensions.
  2. Also bought 1/2″ PVC connectors to put on one end of the pipes. Allows to change the height of the system.
  3. 3/8″ rebar in 1ft sections, but you may want 18″ or 2ft if you have soft ground.
  4. Remay cloth for the frost blanket. It is 67″ and you can buy different lengths. If you need a tall cover, you may need to double the frost blanket as the standard width is 67″ (5ft 7 in.)
Remay cloth for frost protection

Use Remay cloth for frost protection.

Rocks hold down Remay cloth

Rocks hold down Remay cloth. Clips or old garden hose segments fasten to PVC pipe.

Other Frost Management Tips

  • Water often (avoiding the leaves) and well. Water is your veggies’ defense against frost. Keep the ground moist.
  • If you can water with warm water from a garden hose that is out in the sun or if you have a small bed of fall veggies, water with warm water at night before you go to bed.
  • Mulch with hay or newspaper around vegetables to keep soil warm.
  • Don’t forget to remove the blanket if you have a warm day.
  • Instead of using expensive clips to attach the Remay, you could take an old garden hose. Cut 2-3″ lengths and make a slit down the middle so it can go around the PVC pipe.
Remay cloth clip

Remay clips can be bought or made from old garden hose sections slit in half